
Blooming
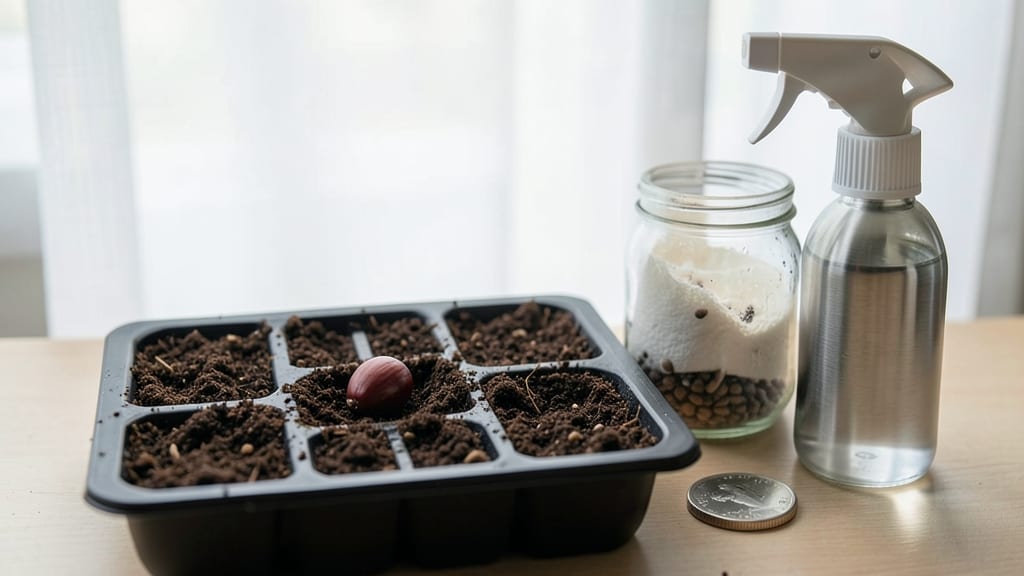
It takes a cherry seed anywhere from 3 to 12 months to sprout naturally—unless you use cold stratification, which can slash that wait time to just 4 to 8 weeks.
Ever wondered why that cherry pit you spit out might never sprout—or how to turn it into a thriving tree? The answer lies in understanding cherry seed germination timelines and the secret technique called cold stratification, which can cut weeks (or even months) off your wait time.
Without intervention, cherry seeds often languish in the soil, waiting for the right conditions to break their dormancy. But with a little patience and the right method, you can speed up the process and watch those first tiny 🍒 sprouts emerge.
In this guide, I’ll walk you through the science behind cherry seed germination, the step-by-step cold stratification process, and pro tips to maximize your success—so you can go from pit to seedling faster than you thought possible.
Cherry seed germination timeline: natural vs cold-stratified sprouting speed
If you've ever spit out a cherry pit and wondered whether it might grow into a tree, you're not alone. The truth is, cherry seeds naturally take between 3 to 12 months to sprout under ideal outdoor conditions.
This long wait happens because cherry seeds require a dormancy-breaking period to mimic winter's natural cold snap, which triggers germination in spring.
The process relies on moisture, temperature fluctuations, and microbial activity in the soil. Without these conditions, many seeds simply linger in dormancy indefinitely.
That's where cold stratification comes in—a technique that replicates winter's chilling effect to accelerate sprouting to just 4-8 weeks, depending on the variety and your setup.
Understanding these timelines helps you set realistic expectations. For example, a sweet cherry seed might sprout in 6-9 months naturally, while a sour cherry could take 9-12 months without intervention.
The key difference? Cold stratification cuts this time by 80%, turning a year-long wait into a matter of weeks.
| Germination Method | Average Timeline | Best Season to Start | Key Requirement | Success Rate |
|---|---|---|---|---|
| Natural Germination | 3–12 months | Spring planting | Soil temperature 50–70°F | 40–60% |
| Cold Stratification | 4–8 weeks | Fall/Winter (6–8 weeks before last frost) | 30–50°F moisture for 6–12 weeks | 70–90% |
| Scarified + Stratified | 3–6 weeks | Year-round (indoor setup) | File-sanded seed coat + stratification | 80–95% |
*Timelines vary by cherry variety and environmental conditions.
Seasonal variations play a huge role in natural germination. Planting cherry seeds in late winter or early spring gives them the best chance, as soil temperatures gradually rise to the 50–70°F range needed for root development.
However, if you plant too early, cold soil can stunt growth, while planting too late risks drought stress as seedlings emerge.
Environmental factors like moisture levels, soil pH, and light exposure also influence speed. For instance, well-draining, slightly acidic soil (pH 6.0–6.5) speeds up germination, while compacted or waterlogged soil can delay it by months. Even direct sunlight vs. partial shade affects how quickly seedlings establish.
Cold stratification works by tricking seeds into thinking winter has passed. By exposing them to consistent 30–50°F temperatures for 6–12 weeks, you break dormancy and jumpstart enzymatic activity inside the seed.
This method is especially useful if you're growing cherries in warmer climates, where natural cold periods are shorter or nonexistent.
Once stratified, seeds should sprout within 2–4 weeks after being planted in warm soil. If you're using the paper towel method, you'll often see tiny root hairs within 7–10 days, signaling it's time to transplant.
Skipping stratification can leave seeds dormant for years, even if conditions seem perfect.
Pro tip: Test a few seeds with and without stratification to compare results. Place one batch in the fridge for 8 weeks and another in a warm, moist environment. The difference in sprouting speed will be striking, and you'll gain confidence in your method.
Remember, patience is key—even with stratification, some seeds may take up to 3 months to sprout. If you don't see green shoots within 12 weeks, the seed may be non-viable. Don't give up; try another pit or adjust your moisture levels.
With the right approach, you can turn that cherry pit into a thriving tree in just a few months instead of years. The secret? Understanding your seeds' natural rhythms—and giving them a little winter boost when they need it most. 🌱
Step-by-step cold stratification guide to force cherry seeds to sprout faster
Cold stratification is your secret weapon for transforming those stubborn cherry pits into sprouts in just 4-8 weeks instead of waiting months. This method mimics nature's winter chilling period, breaking seed dormancy and jumpstarting growth.
The process is simple but requires precision—especially with moisture control and timing—to avoid common pitfalls like mold or rot.
To get started, you'll need just a few household items: paper towels, plastic bags, a refrigerator, and clean seeds. The key is maintaining consistent moisture and cold temperatures (34–40°F) for the full stratification period.
If done correctly, you'll see root hairs emerge in 7–10 days, followed by sprouts within 2–4 weeks after planting.
-
Step 1: Clean and Prepare Seeds
1
Remove flesh from cherry pits and rinse in lukewarm water. Scrub gently with a soft brush to remove any remaining pulp, then let dry for 24 hours on a paper towel.
-
Step 2: Moisten Paper Towels
2
Place 2 paper towels in a shallow dish and dampen with distilled water (tap water can introduce bacteria). Wring out excess water—towels should be damp, not soggy.
-
Step 3: Seal Seeds in Bag
3
Arrange seeds 1 inch apart on one towel, fold the second towel over them, then place the whole setup in a quart-sized plastic bag. Seal tightly to trap moisture but leave a small gap for airflow.
-
Step 4: Stratify in Fridge
4
Store the bag in your refrigerator's crisper drawer (34–40°F) for 6–12 weeks. Check moisture weekly—mist towels with distilled water if they dry out. Rotate the bag every 2 weeks for even exposure.
-
Step 5: Monitor for Sprouts
5
After 4–6 weeks, peek for root hairs or tiny green cracks. If you see roots, it's time to plant! If not, extend stratification 2 more weeks. Discard any seeds showing mold (fuzzy white/green) or foul odors immediately.
-
Step 6: Plant Stratified Seeds
6
Fill small pots with sterile potting mix (50% peat, 50% perlite). Plant seeds ½ inch deep, cover with a clear lid or plastic wrap, and place in bright indirect light (70°F). Sprouts should appear in 2–4 weeks.
Troubleshooting is half the battle. If your seeds develop mold, it’s usually from excess moisture—open the bag for 24 hours to dry them out. For rotten seeds, the issue is often anaerobic conditions; ensure your bag has airflow.
Pro tip: Use sand or vermiculite instead of towels for better drainage if you’re worried about rot.
Once sprouted, keep seedlings in bright, indirect light until they develop 2–3 true leaves (about 6–8 weeks). At this stage, they’re ready for outdoor transplantation after the last frost. With cold stratification, you’ll see 80%+ germination success—far better than the 40–60% rate of natural germination.
Remember, the longer you stratify (up to 12 weeks), the higher your success rate. But don’t overdo it—seeds can dry out or rot if left too long. Test a few seeds at 6, 8, and 10 weeks to find your sweet spot.
With this method, you’ll go from pit to seedling in just 2–3 months—not years! 🌱